
How To Weld In Cricut Design Space
Wondering how to use the Cricut weld tool in Design Space? Here is everything you need to know, from what weld means and how to use it to create shapes and connect cursive letters, to troubleshooting some of the most common Cricut Design Space welding problems.
Active Time 5 minutes
Equipment
- Cricut Design Space
Instructions
Using Weld to create custom shapes
- Create or open a project in Cricut Design Space with multiple shapes or letters.
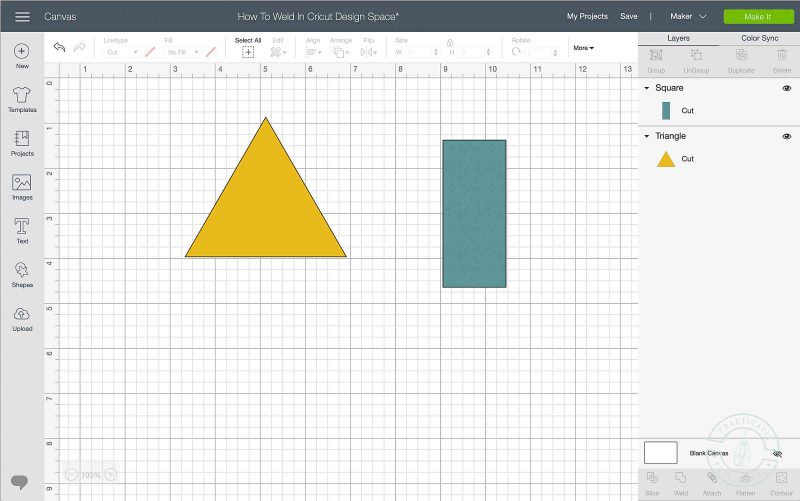
- Select one of the shapes and position it so that it is overlapping the other image.
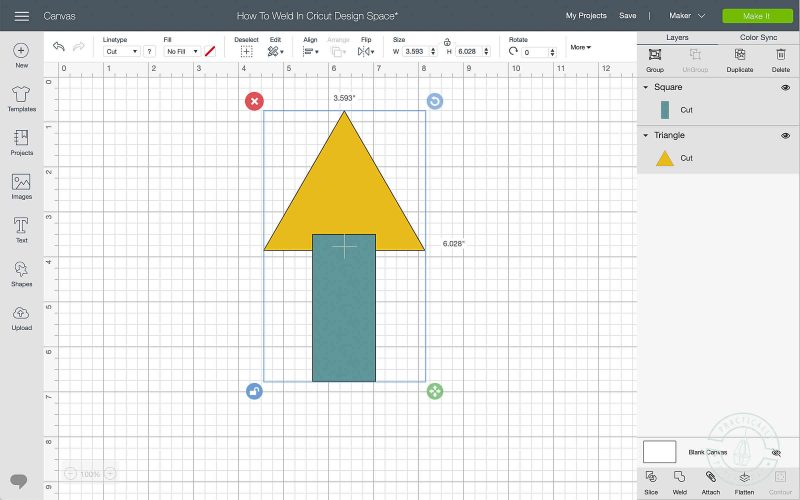
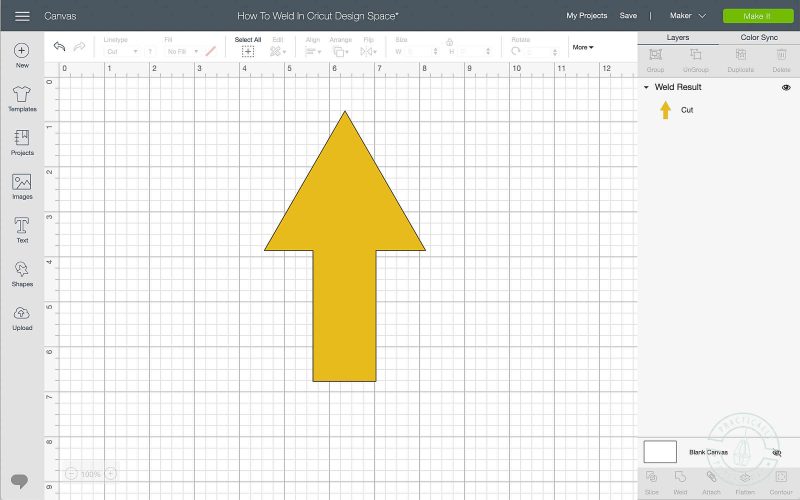
- Select both images and click "Weld". You will end up with a single layer containing the welded image.
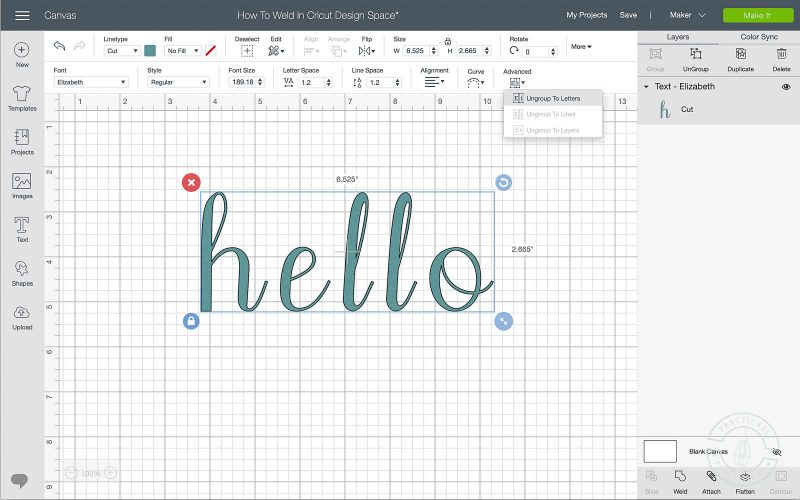
How to connect letters in Cricut Design Space using Weld
- Create or open a project in Cricut Design Space and add text in a script font.
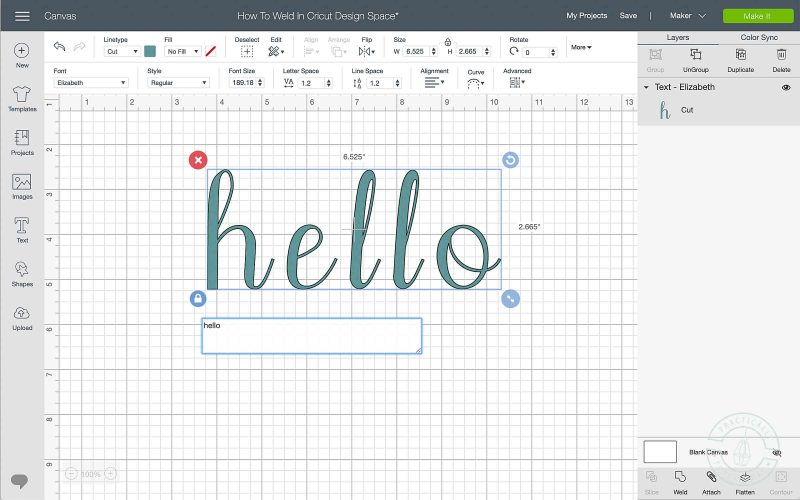
- Select the text and choose "Ungroup To Letters" from the "Advanced" dropdown menu in the toolbar at the top of the screen.
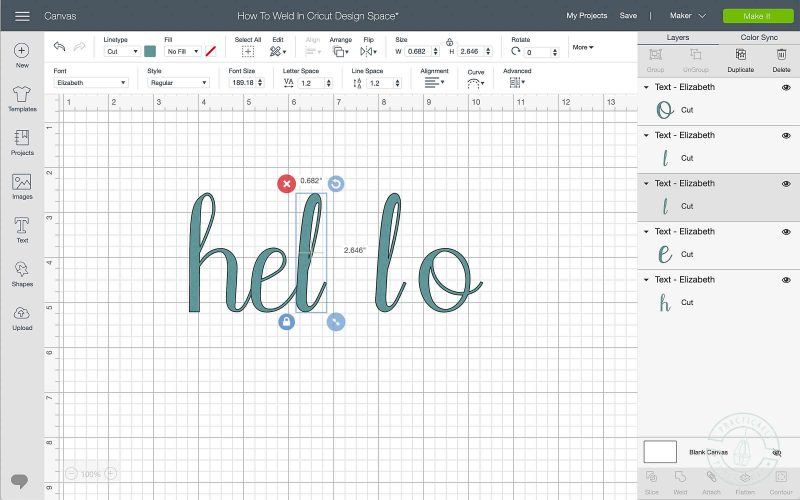
- Select each letter individually and position it so that it is overlapping the previous letter.
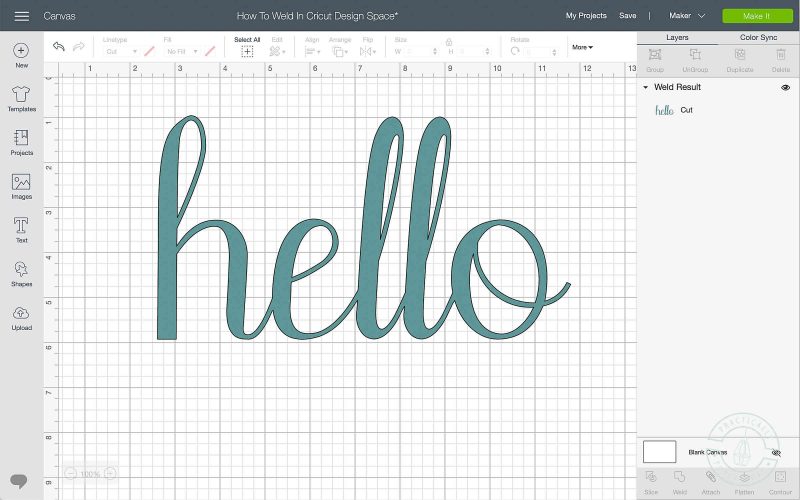
- Select all of the letters at once and click "Weld". You will end up with a single layer containing the welded word.
Notes
Using Weld in Cricut Design Space is pretty simple, but there are a few rules you have to follow.
- You must be working with at least two shapes/layers. You can't weld a single layer; the Weld button will be greyed out if only one layer is selected.
- Welding always merges shapes "down" to the bottom layer. If your layers are different colors, the final Weld Result will be the color of the bottom layer.
- Weld works even if the images are grouped, attached, or multi-layered/hidden. Design Space will automatically ungroup or un-attach any grouped or attached layers when you weld them.
- Hidden layers will disappear after welding. If you want to keep any hidden layers of a multi-layer image, be sure to unhide them before welding.
- Weld only works on overlapping images. Your shapes must have overlapping or intersecting cut lines for Weld to combine them into a single shape.
- ...unless you purposely are trying to weld images that aren't touching. If your shapes aren’t stacked on top of each other, welding them will basically just "merge down" the top shape into the bottom layer without actually modifying the shapes themselves.
- Welding text is the same as welding images. The Weld tool doesn't treat text any different from any other image or shape, regardless of whether you are welding an entire word or you've already ungrouped the text to letters.
- Welding is permanent and can't be undone. Once you save your project after welding, it can't be reversed. But obviously if you just welded something by accident you can alway click Undo or press Command/Ctrl + Z on your keyboard to undo the action; just click Undo before saving!
Save your favorite projects!
Create a free account to easily save your favorite projects, tutorials, and recipes.
Create Account