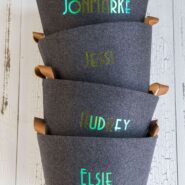
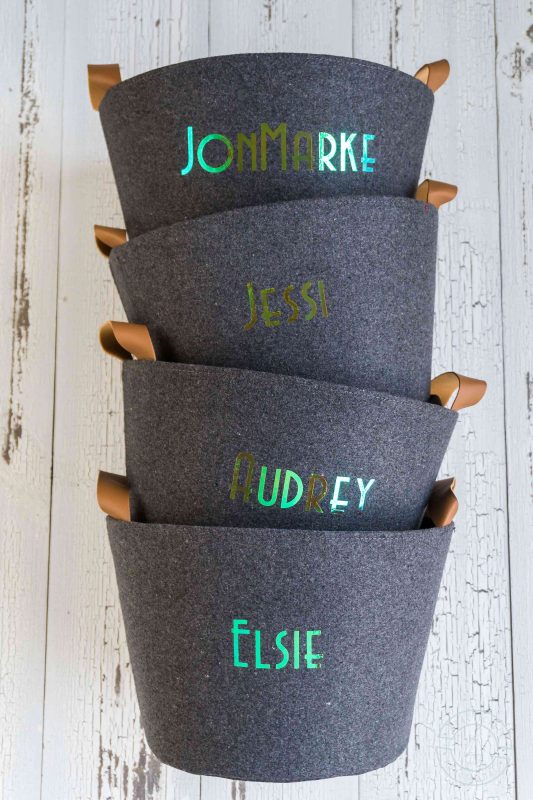
Make Personalized Storage Bins With A Cricut Joy
Make these cute personalized storage bins with a Cricut Joy and Smart Holographic Vinyl; they're perfect for organizing your mudroom or entryway, or organizing kids toys! (The screenshots in these instructions were made using the Cricut Design Space app on an iPhone.)
Active Time 15 minutes
Cricut Cutting Time 5 minutes
Total Time 20 minutes
Yield 4 personalized storage baskets
Cost $25
Materials
Instructions
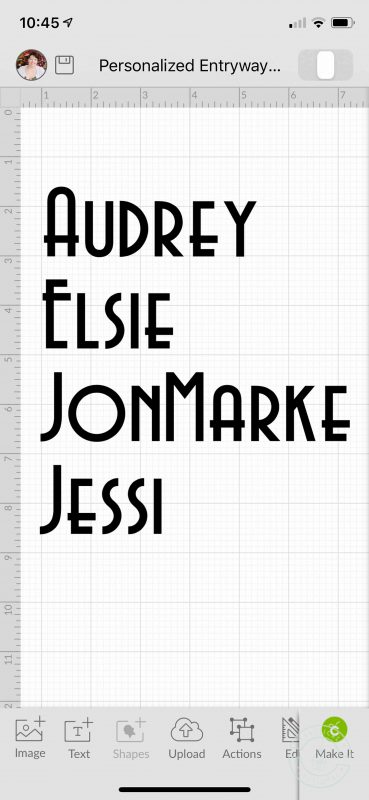
- Open the storage bin labels project in Cricut Design Space.
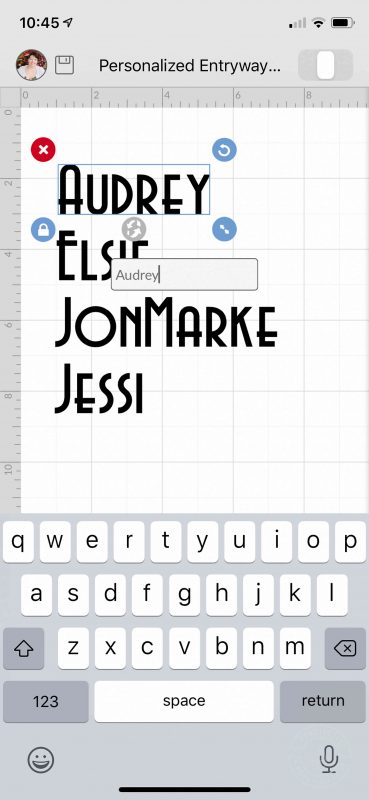
- To customize the name, double tap a name, then change the text in the edit box that pops up.
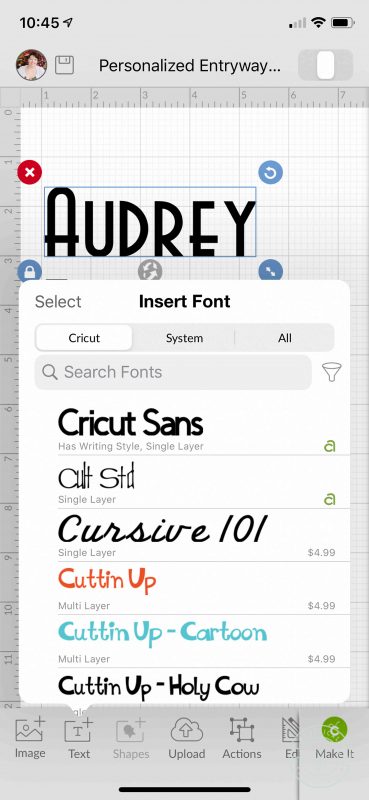
- You can also tap the Text button at the bottom and change the font or font size. Tap Make It when you're ready to send the names to your Cricut.
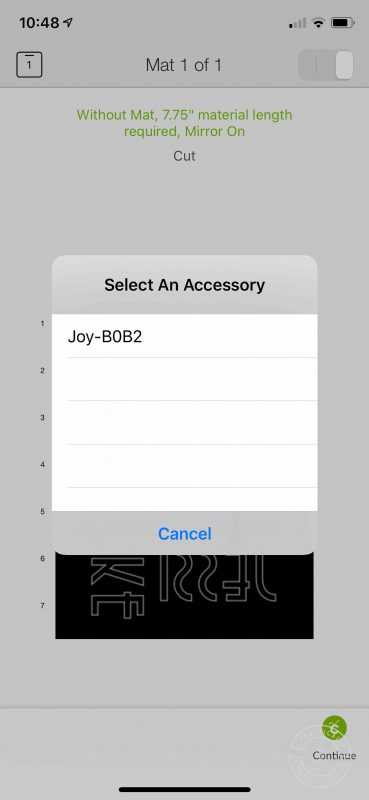
- Choose your Cricut Joy machine from the list to connect to it.
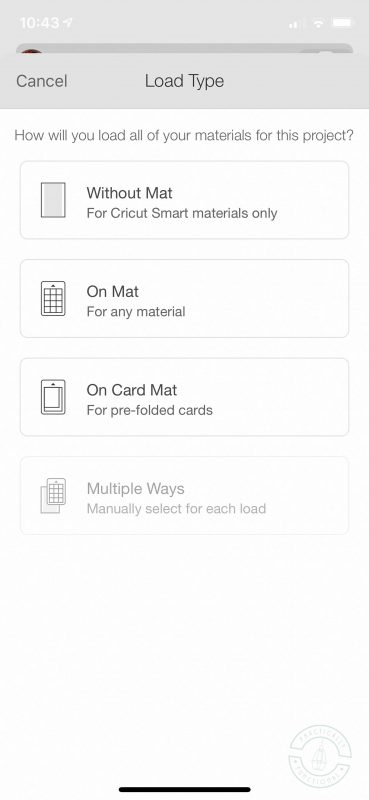
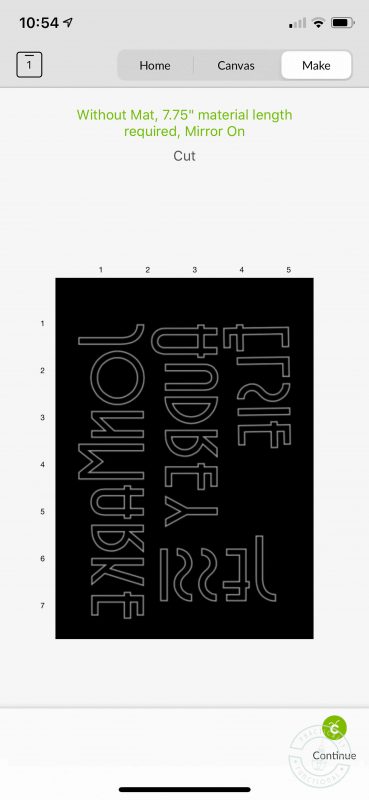
- Select "Without Mat" for the load type. (Always use this setting when cutting Smart materials with a Cricut Joy.)
- Tap the green text at the top of the mat preview, or tap the little square mat icon in the top right to open the settings screen.
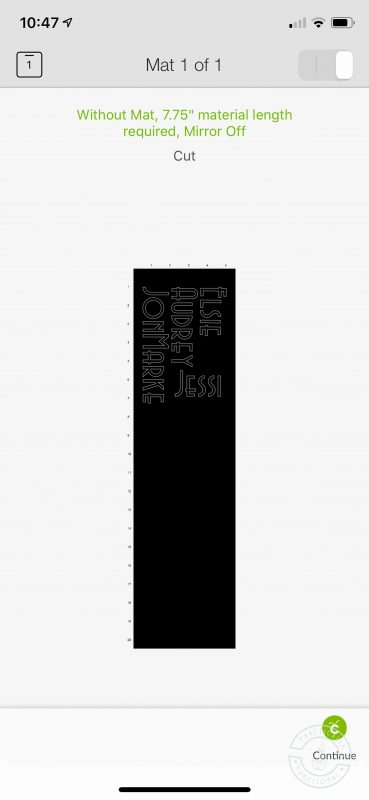
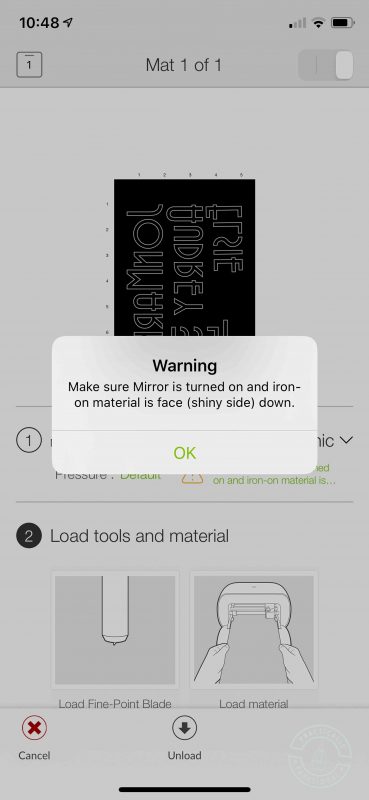
- Make sure that Mirror is toggled on. Tap the square mat icon again to close the settings screen.
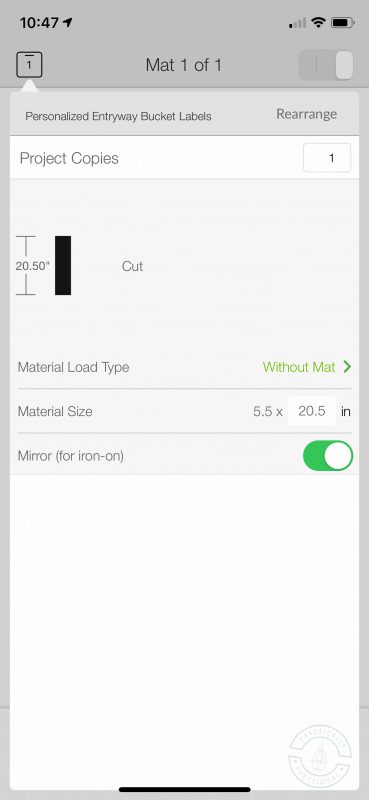
- Reposition the names if you want to, then tap Continue in the lower right corner.
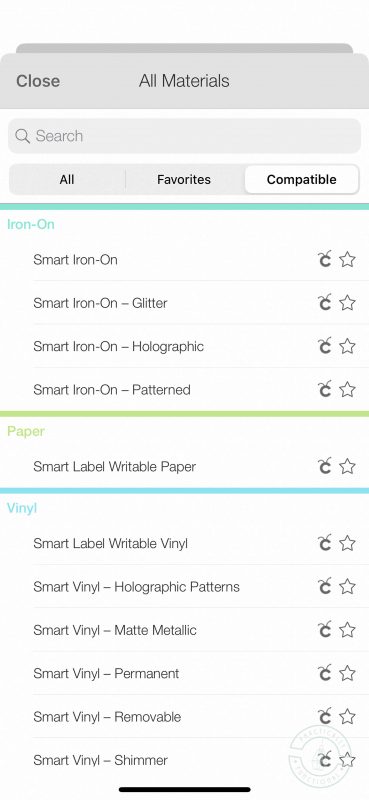
- Select "Smart Iron-On - Holographic" as the material. If it doesn't appear as one of the default choices, tap the green All Materials link to open a list of all materials, then you can browse or search for it.
- Tap OK on the warning reminding you to always have Mirror turned on.
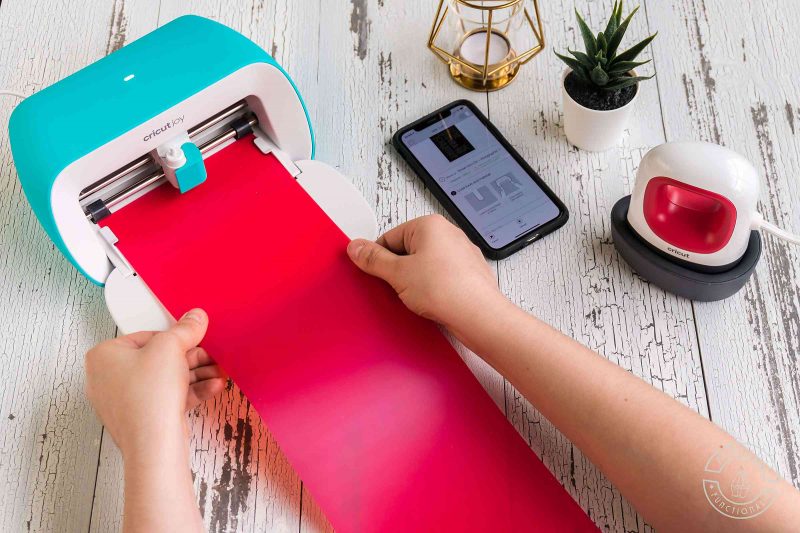
- Make sure the fine point blade is installed in your machine, then load the Smart Iron-On into the Cricut Joy (making sure the shiny plastic side is face down.)
- Tap Go to begin the cut.
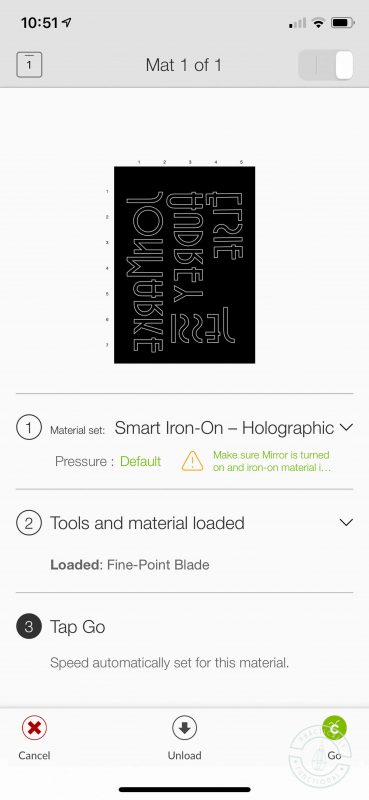
- Tap "Unload" to unload the material from the Cricut Joy when the cut is complete.

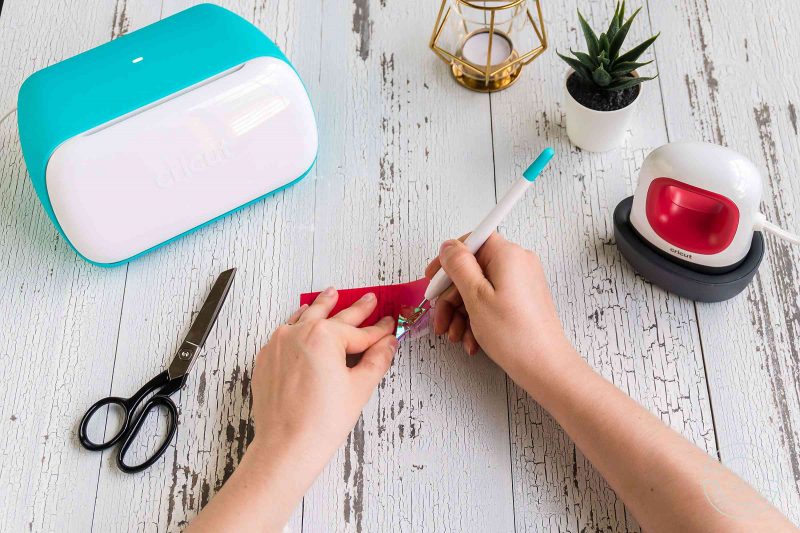
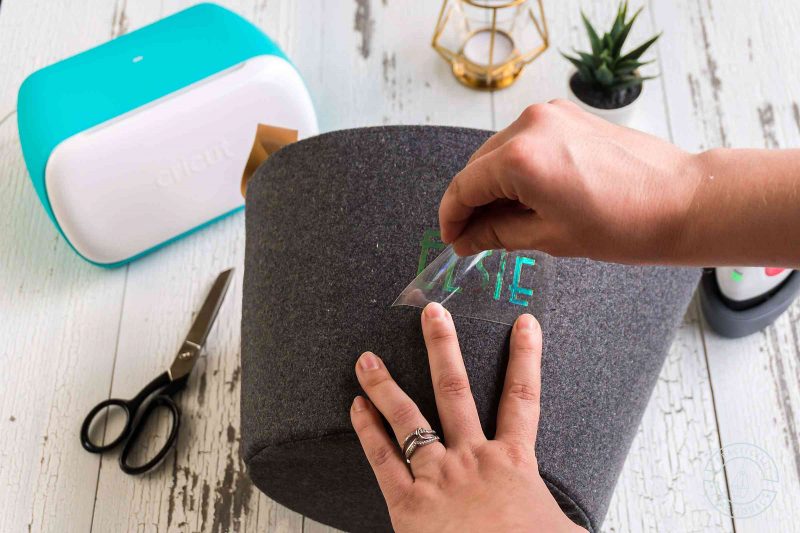
- Cut the names apart with scissors, then weed away any extra background vinyl on each name using the weeder tool.
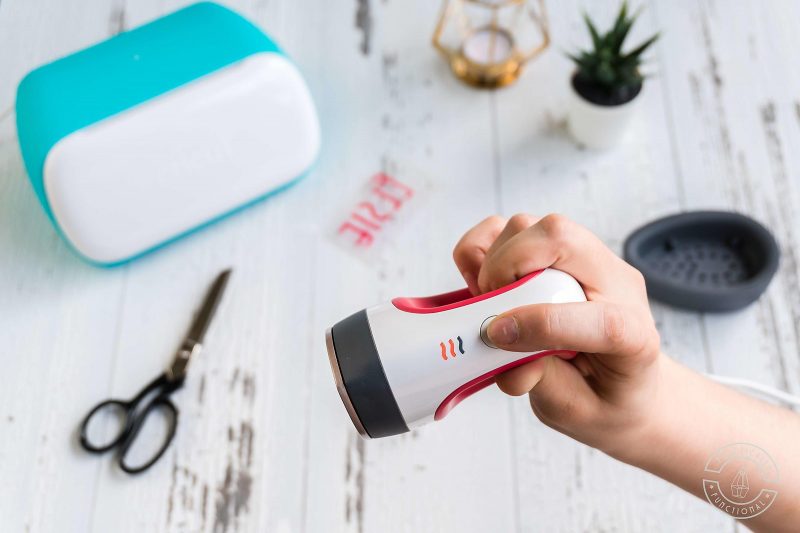
- Plug in and turn on your Cricut EasyPress Mini to the settings suggested by the Cricut Heat Guide. (In this case for Smart Iron-On and Polyester bins I used medium heat.)
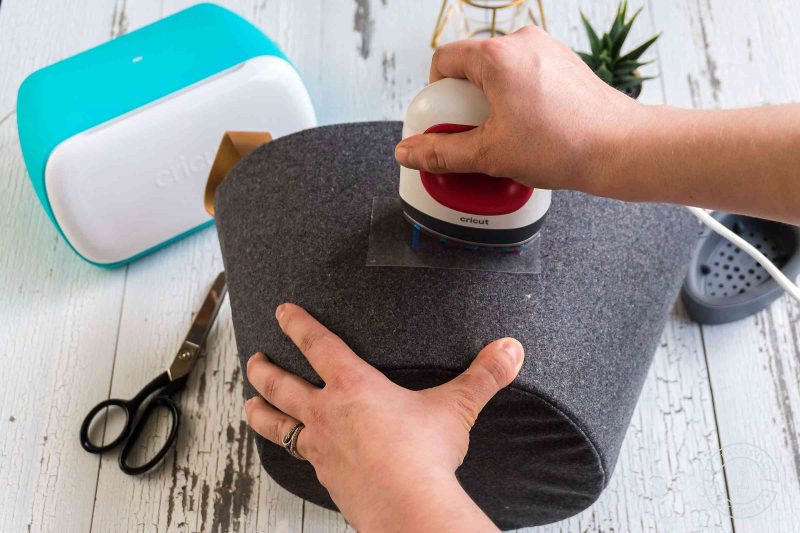
- Position a name on a bin and press with the Easypress Mini following instructions from the Cricut Heat Guide. (In this case I pre-heated for five seconds then pressed for thirty seconds.)
- Carefully remove the plastic backing from the Iron-On.
- Repeat to make as many personalized storage bins as you want, and you're done!
Notes
I found these cute felt baskets at Bullseye's Playground in my local Target. These exact ones aren't available anymore, but Target has tons of fabric storage bins, and I also found something similar on Amazon.
Save your favorite projects!
Create a free account to easily save your favorite projects, tutorials, and recipes.
Create Account