
How To Contour In Cricut Design Space
Wondering how to use Contour in Cricut Design Space? Here is everything you need to know about using Contour to turn on or turn off cut lines within a single image, and troubleshooting some of the most common problems with using the Cricut Contour tool.
Active Time 5 minutes
Equipment
- Cricut Design Space
Instructions
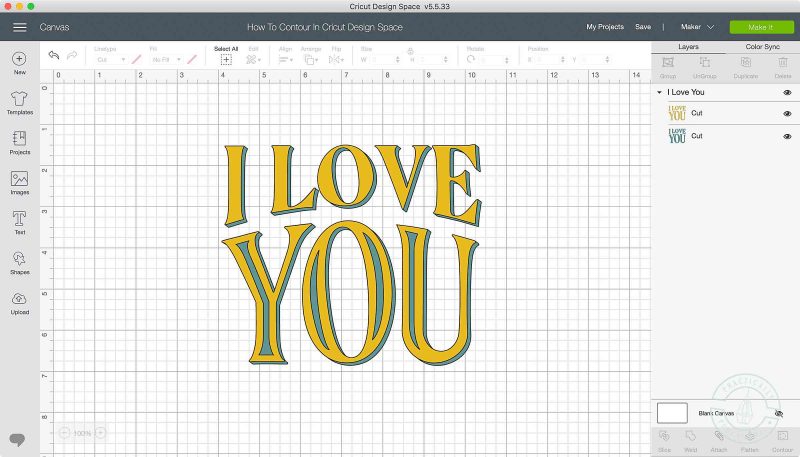
- Create or open a project in Cricut Design Space with a shape that you want to hide a portion of.
- Select one single layer in the Layers panel at the right.
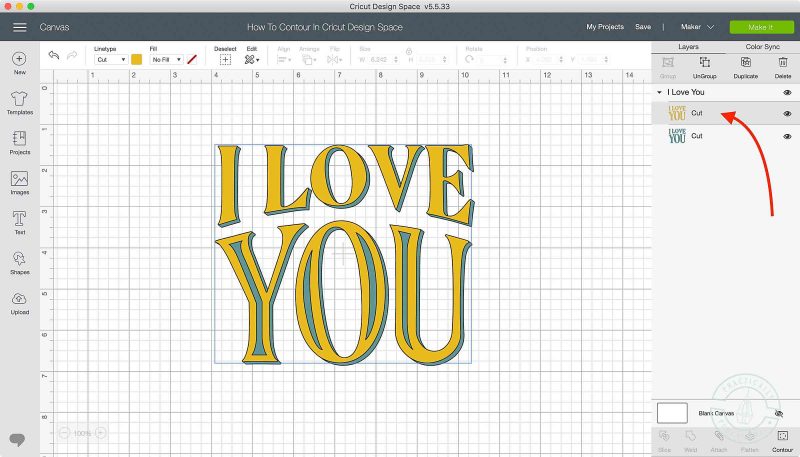
- Click Contour to open the Hide Contour window.
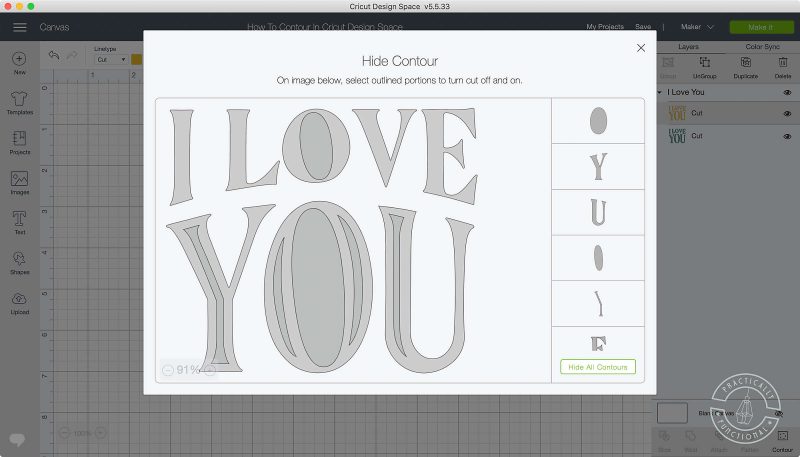
- Select the cut line or shape you wish to hide by clicking on it in the main preview area on the left, or by clicking on the individual shape in the list on the right.
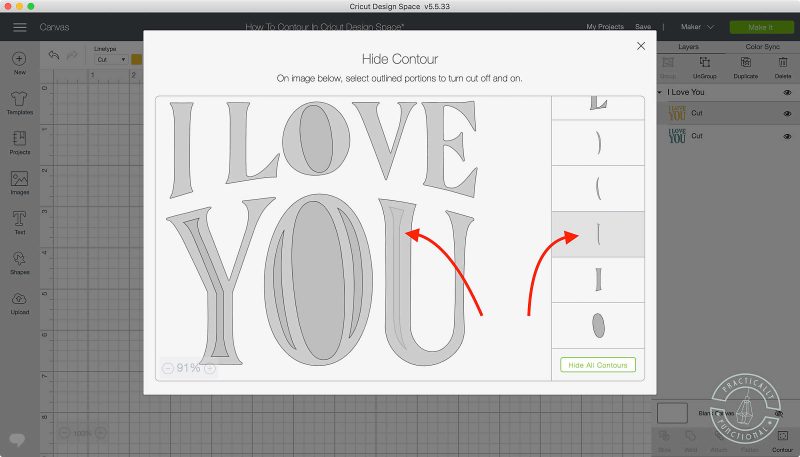
- "Hidden" cut lines will be greyed out in the preview, and the shape on the right will be highlighted in darker grey. Continue selecting shapes until you've hidden the parts you want hidden.
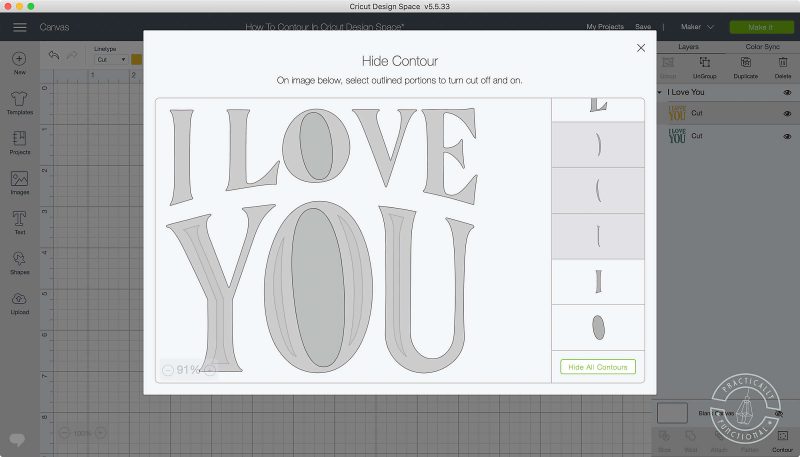
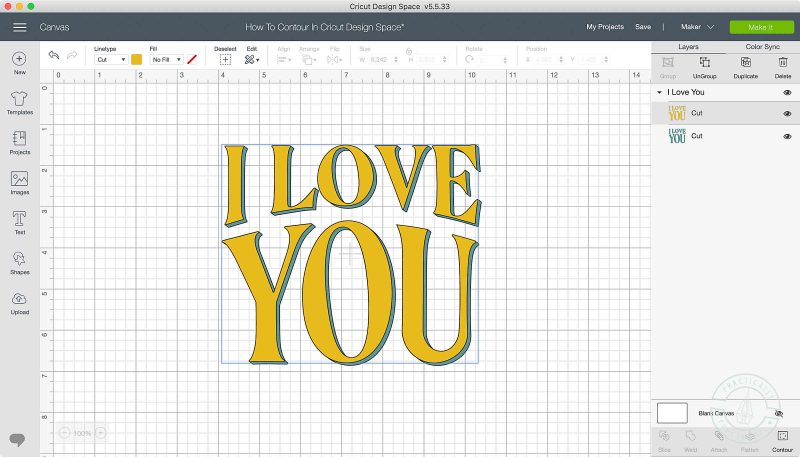
- Click the X in the upper right corner, or click anywhere outside the window to close the window. You will see your Contoured design on the Canvas.
Notes
Using Contour in Cricut Design Space is pretty simple, but there are a few rules you have to follow.
- You must be working with just one shape or layer. The Contour button will be greyed out if multiple layers or multi-layer images are selected.
- Contour only works on images that contain more than one cut line. The Contour tool is designed to show or hide individual cut lines within a "complex" image or shape. Simple shapes (like a square or circle or anything else made with the Shape tool) have just one cut line around the exterior of the shape, so you cannot Contour them. If you need to hide a simple shape, just use the Hide button.
- Contour does not work on editable text layers. Contour only works on "static images," so the button will be greyed out if you have an editable text layer selected. You must first Weld the text into a static image before Contour will work.
- Contouring images is "temporary." If you hide certain cut lines using Contour, they are just turned "off" so your Cricut will not cut along them, but they are not actually removed or deleted from the project. You can use Contour again later to turn those cut lines back on if you want.
- Contour does not work on layers that are Grouped, Attached, Flattened, or on multi-layered images. Contour only works on a single layer at a time, so any "groups" of layers, like multi-layered images or layers created when using Group and Attach cannot be Contoured. However, if you select a single layer from within the layer group you will be able to Contour just that one layer. Flattened images also cannot be Contoured because Flattened images are only for use with Print Then Cut. Unflatten any image before Contouring.
- Contour only works on cuttable images. Contour only works with cut lines. It works with any cuttable image or design found within the Cricut library, or with any SVG file or other image that is uploaded into Design Space and saved as a Cut image. However, it does not work on the printable lines within PNG or JPG files uploaded to Cricut Design Space if the photos are saved as Print Then Cut images.
Save your favorite projects!
Create a free account to easily save your favorite projects, tutorials, and recipes.
Create Account