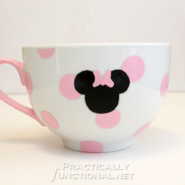
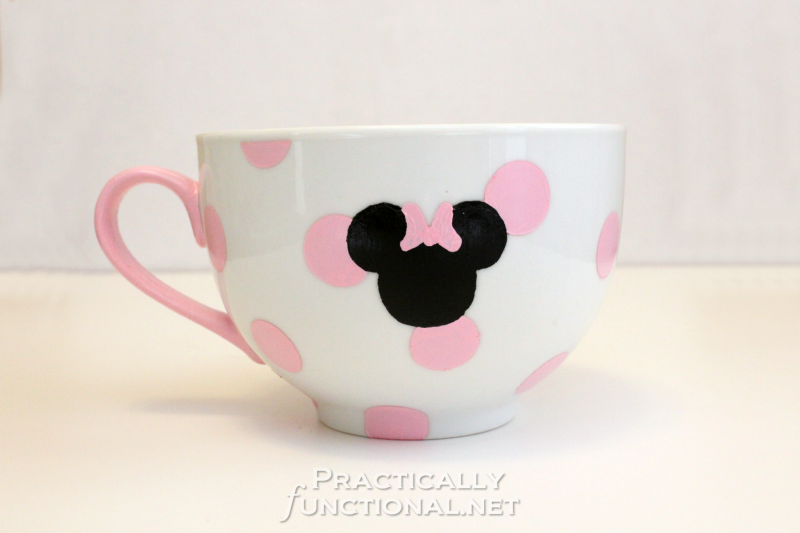
Make Your Own Minnie Mouse Mug!
Make a super cute Minnie Mouse mug with enamel paint and a few stencils! Such a great way to add some Disney spirit to your morning coffee!
Active Time 2 hours
Drying/Curing Time 5 days 4 hours
Total Time 5 days 6 hours
Yield 1 mug
Cost $10
Equipment
- paintbrush
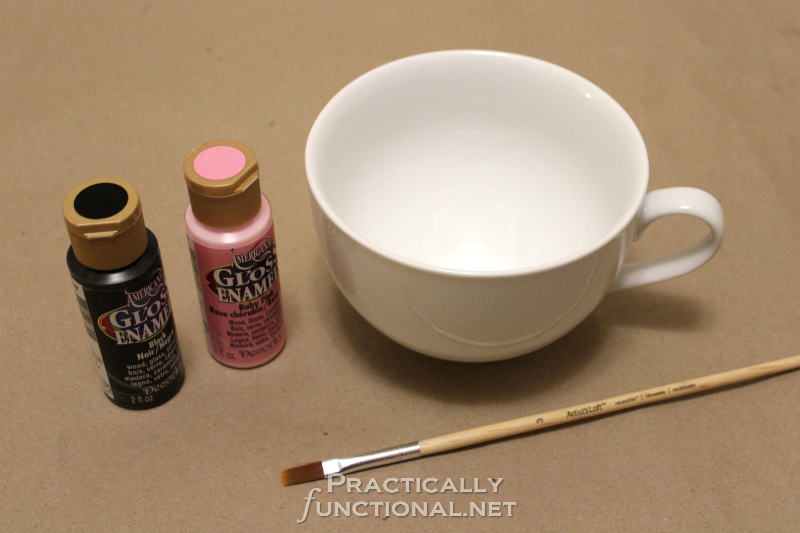
Materials
- 1 plain white mug
- ceramic paint in Baby Pink and Black
- 1 sheet stencil material
- rubbing alcohol
- cotton balls or cotton pads
Instructions
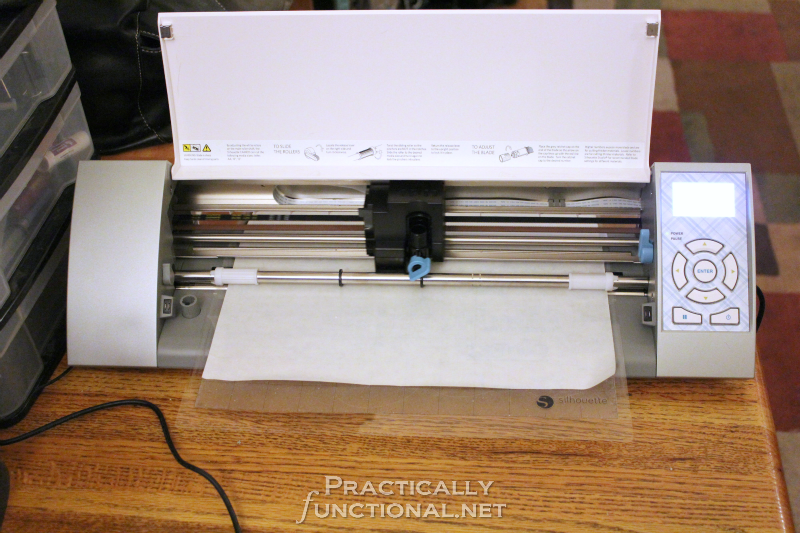
- Use stencil material and a Cricut or Silhouette cutting machine to make a simple stencil. You can download the Silhouette cutting file that I used here, or download a PDF version of the template if you plan to cut it out by hand.
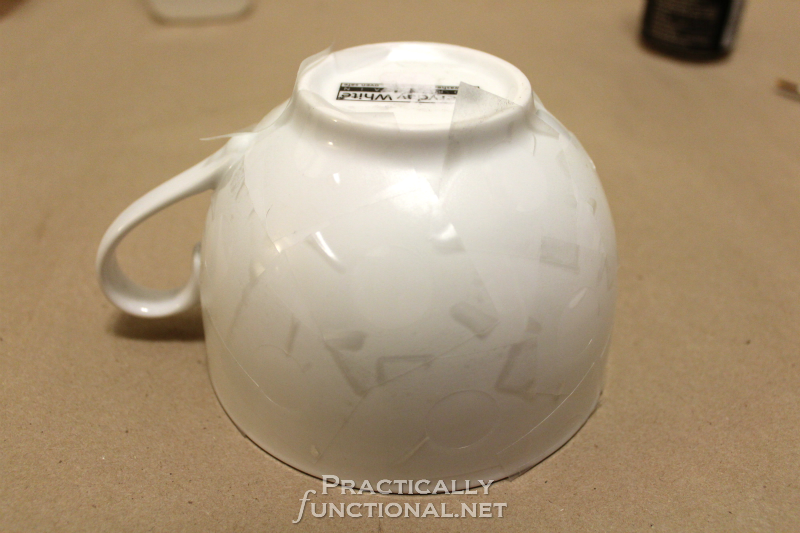
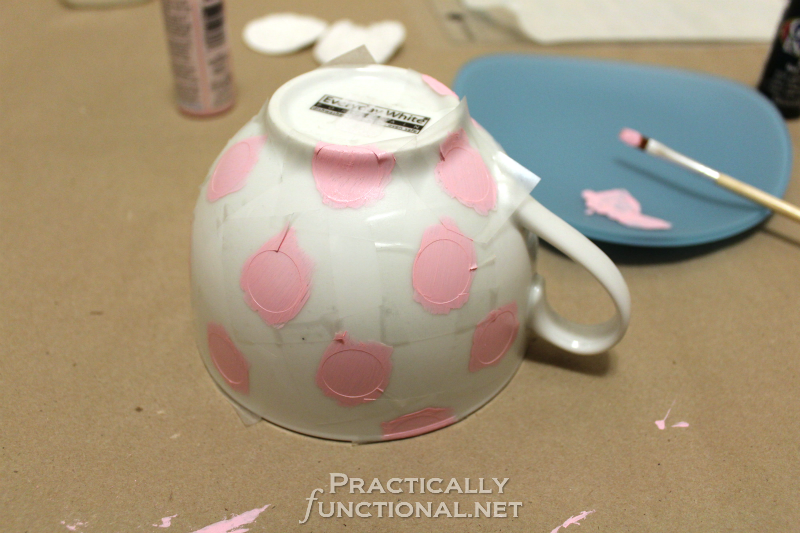
- Clean your mug with rubbing alcohol and cotton balls to remove any dirt and oils.
- Position the polka dot adhesive stencils on your mug, making sure to press down firmly along all the edges so no paint seeps under when you paint.
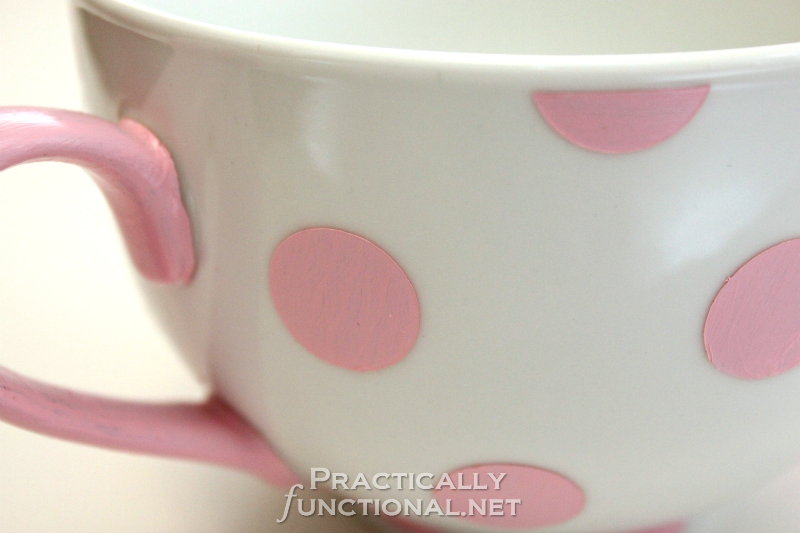
- Paint the polka dots with a light coat of baby pink enamel paint.
- Let the paint dry for 4 hours, then apply a second coat if necessary.
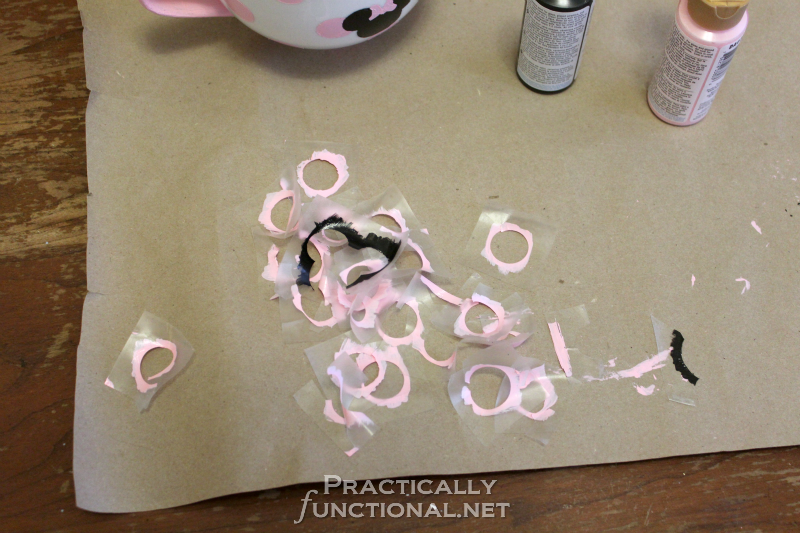
- After the paint is fully dry, carefully peel away the stencils. If the paint starts to peel away with the stencil, let the paint dry overnight first.
- Position the Minnie Mouse head stencils where you want them, then paint with a coat of black enamel paint.
- Let the paint dry for 4 hours, then apply a second coat if necessary.
- After the paint is fully dry, carefully peel away the stencil. If the paint starts to peel away with the stencil, let the paint dry overnight first. If any pink polka dot paint comes up when removing the stencil, you can fix it when touching up.
- Touch up the paint as needed with a small paintbrush, or use an Xacto knife to remove any paint that bled under the edges of the stencils.
- Set the mug aside and let it cure for 4 days.
- Place the mug in a cold oven, then turn it on to 325 degrees and set a timer for 30 minutes. (Be sure to double check and follow the directions on your paint bottle here.)
- After 30 minutes turn off the oven and open the door. Leave the mug in the oven with the door open until it is fully cooled.
Notes
If your paint isn't food-safe, be sure to leave the inside and a small section near the rim unpainted so that you can safely drink from the mug!
Save your favorite projects!
Create a free account to easily save your favorite projects, tutorials, and recipes.
Create Account