
How To Make A Hardcover iPad Case & Stand
Make a simple DIY iPad case to protect your iPad using an old binder, fabric, a piece of elastic, and some glue! The hardcover case protects your iPad and even folds back to be a stand for your device!
Active Time 2 hours
Total Time 2 hours
Yield 1 iPad case
Cost $5
Equipment
- utility knife
- foam brushes
- a flat head screwdriver or chisel
- a drill, or another hole-making device to make a hole for the camera
- a hammer
- a grommet tool (if you buy grommets they usually come with the tool you need)
- a pencil
- a ruler or tape measure
Materials
- 1 old 3-ring hardcover binder for the backing of the case
- fabric to cover the outside of the case
- fabric for the lining the inside
- Mod Podge
- craft glue
- 3 ½ feet elastic
- 1 piece cardstock paper color doesn’t matter
- 1 7/16″ grommet usually in the fabric/upholstery section of your local craft store, not the paper crafts section
Instructions
Remove the binder boards from your binder
- Open the binder and cut off the bottom plastic-y edge of the front cover.
- Make a Y cut up from the bottom, then pull the board out of the plastic binder covering.
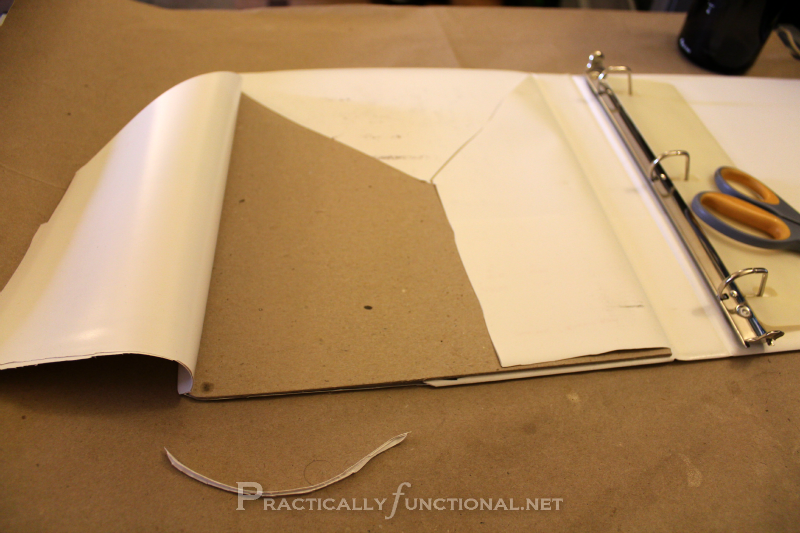
- Using scissors or a utility knife, cut the entire metal 3-ring piece off of the back cover of the binder. Pull the board out of the plastic binder covering.
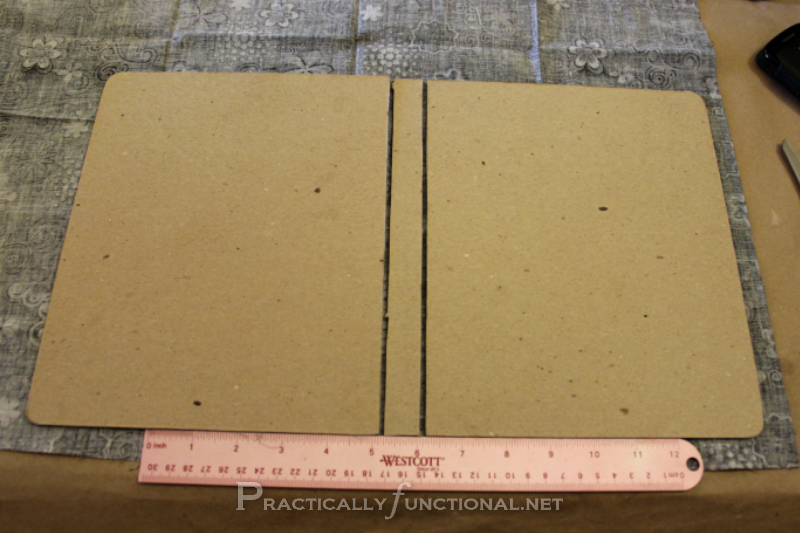
Cut the boards to size
- Cut out two 8″ x 10″ pieces for the front and back covers, and cut one 3/4″ x 10″ piece for the spine. (Adjust these sizes depending on your iPad size.)
- If you want your corners rounded, trace the iPad corner onto the board and cut that as well. Make sure you only round the two outer corners on the front and back pieces.
Cut the fabric to size
- Lay your board pieces out on the wrong side of the fabric, leaving about 1 millimeter of space between the boards so that your cover can fold properly.
- Cut your fabric down to size, leaving about an inch of extra room around all four edges.
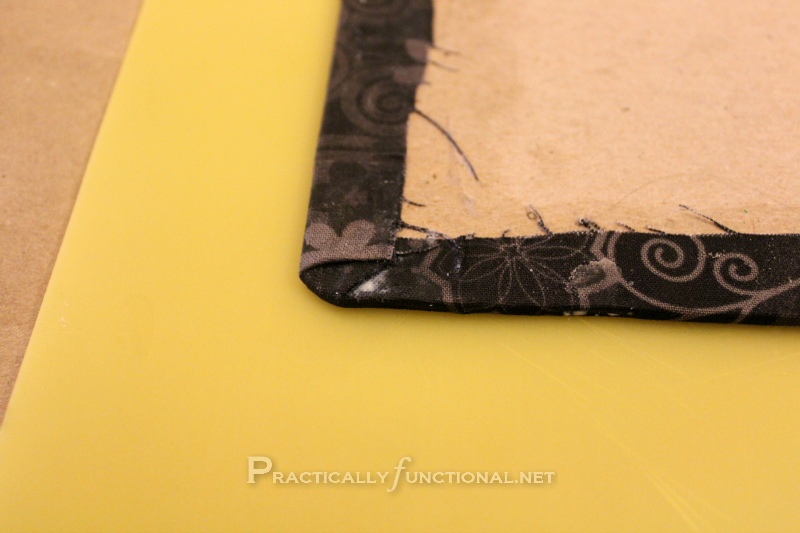
Mod Podge the fabric onto your boards
- Brush a thin layer of Mod Podge onto the back of the boards and press them down onto the fabric, exactly the same way they were laid out before. You can use a ruler here to help line the board up straight and to make sure you leave that millimeter of space.
- Fold the fabric around the corners 3 or 4 times (like a paper fan) to get the fabric to go smoothly over the rounded corners.
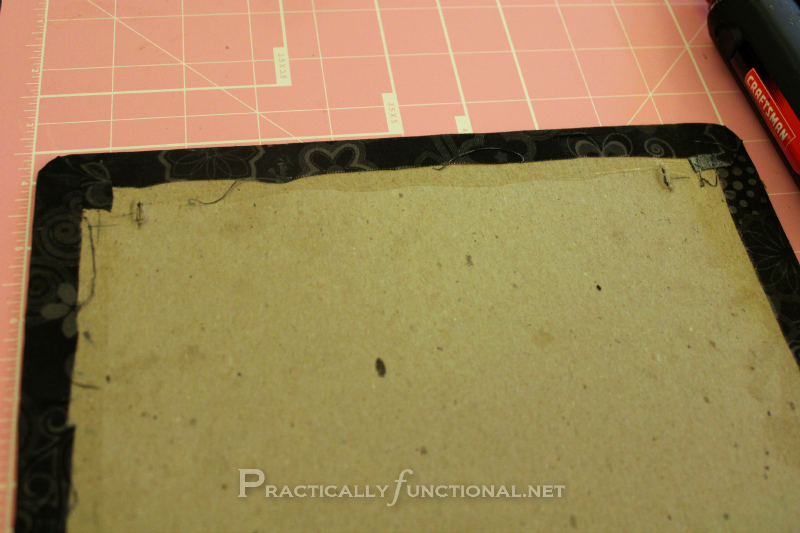
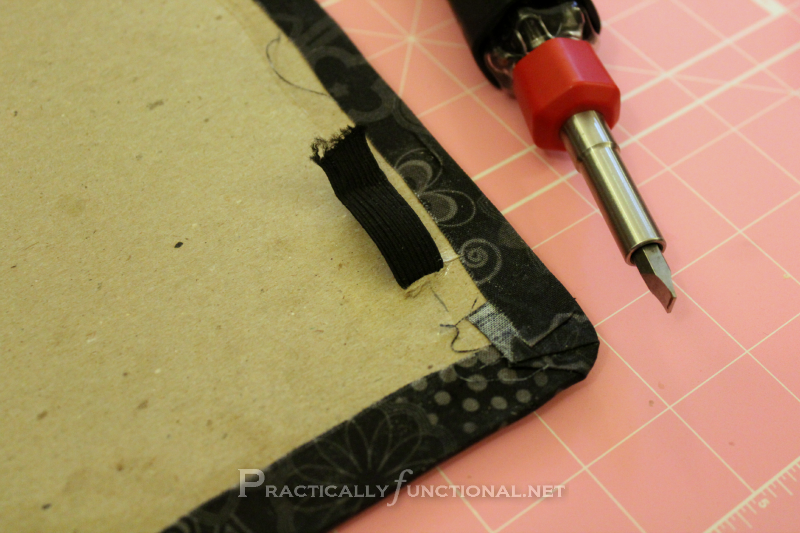
Punch slits into the back for the elastic strap
- Turn the case over so the fabric side is up.
- On the back cover, mark approximately one inch in from the edges on both corners, then punch two slits through with your screwdriver or chisel. You want to punch from the fabric side inwards.
Thread your elastic strap into the cover and attach
- Cut a strip of elastic long enough to wrap entirely around the case from top to bottom.
- Thread both ends of the elastic through the slits, leaving about one inch of extra elastic on the inside.
- Size your elastic strip by placing the iPad inside the case and closing it.
- Wrap the elastic around the front cover to hold it shut and pull the ends of the elastic until the cover is being held snugly closed.
- Hold the ends of the elastic in place, remove your iPad, and glue the ends down to the inside of the cover.
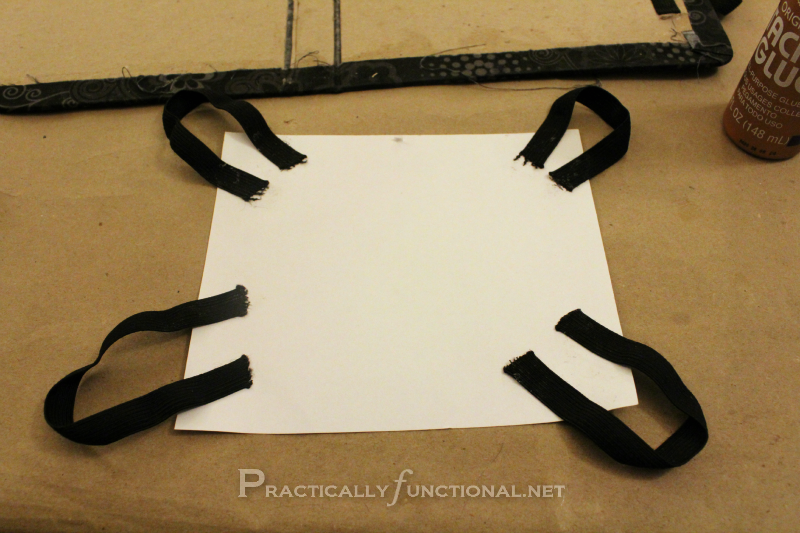
Cut four strips of elastic, size them to hold down the corners of the iPad, and attach them to the cardstock
- Cut a piece of cardstock to about 8″ x 6″.
- Cut four strips of elastic about 4″ to 5″ long each.
- Turn your iPad over on its screen and place the cardstock in the middle of the back.
- Wrap a piece of elastic flat around one corner of the iPad, pull it slightly taut, and mark the ends of the elastic strip on the cardstock.
- Remove the iPad and glue the ends of that piece of elastic down onto the cardstock where they are marked.
- When the glue is dry, place the cardstock on the back of your iPad again and loop the elastic you just glued down around one corner of the iPad.
- Wrap another piece of elastic around another corner of the iPad.
- Continue gluing elastic, looping it over a corner, and measuring and marking the next corner until all four are done.
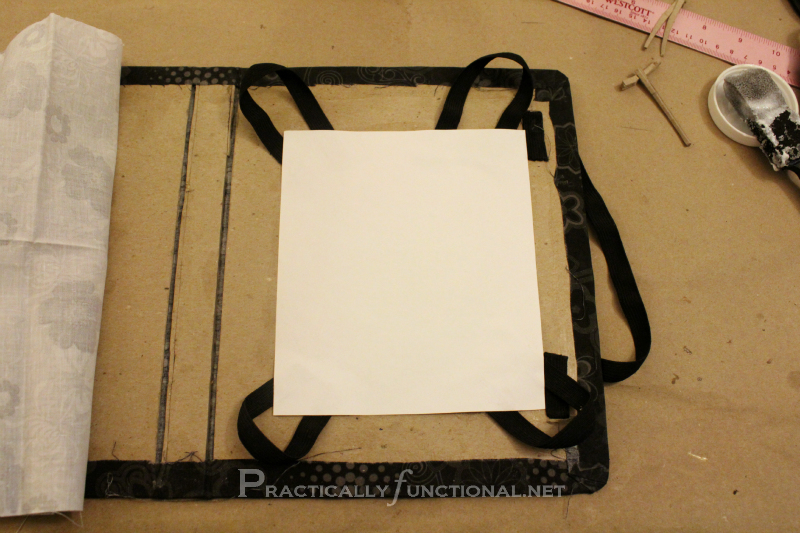
Attach the cardstock and elastic to your case
- Put your iPad into the cardstock/elastic contraption and center it inside the cover.
- Leaving the cardstock down against the board (in the exact place where you centered it), carefully remove the iPad and glue the cardstock/elastic in place to the binder board.
Line the left cover and spine by Mod Podging fabric onto the inside and folding the raw fabric under at the edges/corners
- Open up the cover, lay out your inside fabric, and cut it to size. Leave about a 1/2″ of extra fabric around all four edges.
- Apply a thin layer of Mod Podge to the entire inside of the left cover except for one inch around the edges and press your fabric down.
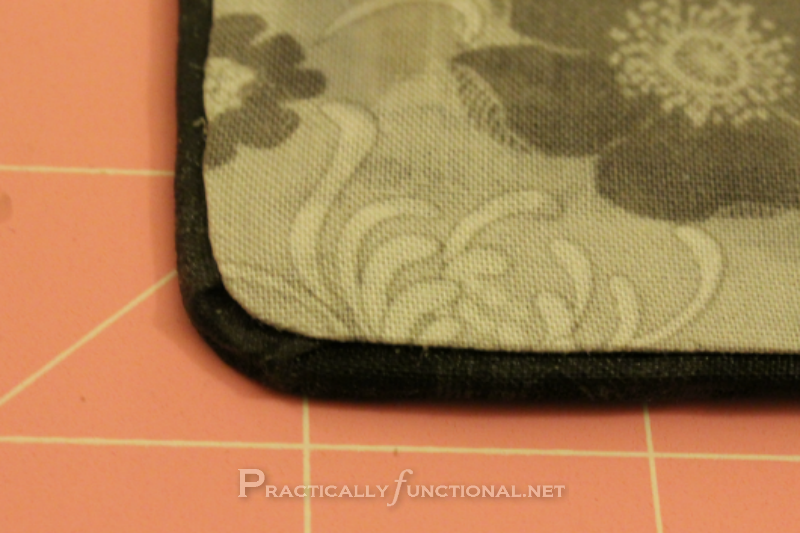
- Starting on one edge, fold the raw edge of the fabric under leaving a millimeter of your “outer” fabric showing, then Mod Podge the folded fabric down onto your board.
- For the corners, fold the fabric in on itself 3 to 4 times to make a rounded corner (same as you did for the outer fabric) being sure to fold the raw edges underneath as you make the corner folds. Mod Podge the corners down once the fabric is folded up nicely.
- Continue Mod Podging and folding your lining fabric down at the edges, working your way towards the center and right side of the case.
- When you reach the spine, Mod Podge right over it, and over the gaps between the spine and covers, just like normal. The fabric spanning the gaps will become the "hinges" so the case can fold open and closed.
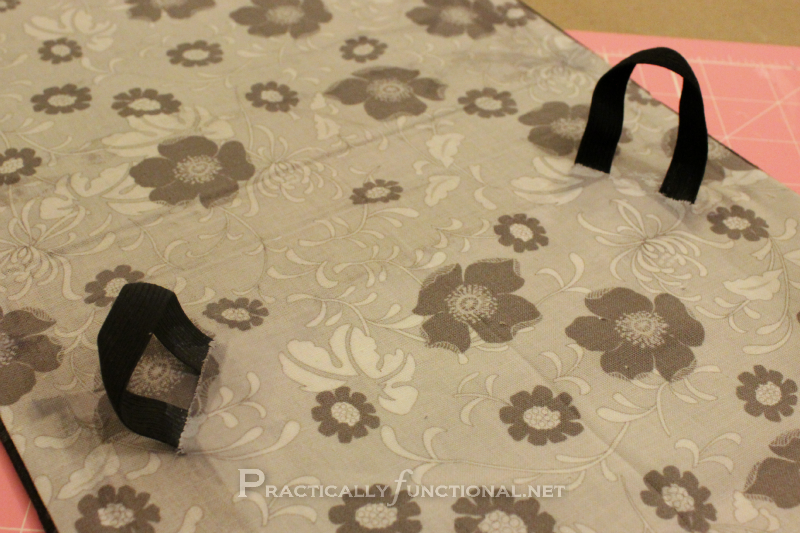
Cut slits in the fabric to pass the elastic loops through, then Mod Podge the rest of the lining down
- To line the right side of the cover, lay your fabric over the cardstock and elastic and mark with a pencil where your slits need to be. About 1 ½" of the elastic "loop" should poke through the fabric (3" to 4" of elastic if it were straightened out) to hold the corners of your iPad down securely.
- Cut the slits with a utility knife.
- Continue Mod Podging the lining fabric onto the right cover and folding the raw edges under.
- When you reach the elastic loops, poke them through the slits in the fabric, then Mod Podge the fabric down to cover the ends of the elastic and the cardstock, leaving the looped ends free.
- Fold the last two corners of lining fabric under and Mod Podge them down onto the right cover.
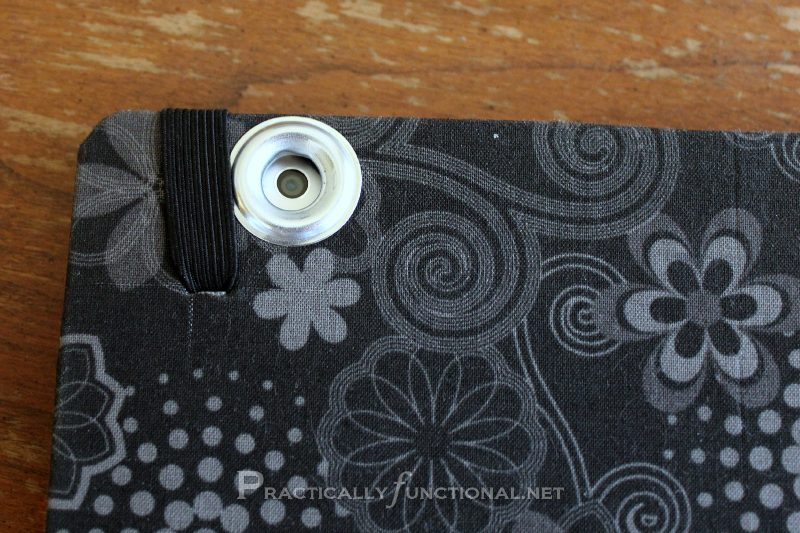
Drill a hole in the case for the camera
- Once the Mod Podge is completely dry, put your iPad in the case.
- Mark where the camera hole should be on the back cover. Estimating a little bit is okay, you can always make a bigger hole later if you need to.
- Pull the iPad out of the cover and drill a hole through the cover where you marked it.
- Put your iPad in the case and open the Camera app. If you can see the edges of the cover through the camera, take the iPad out of the case and use a larger drill bit to make the hole bigger so the camera has a clear view.
- Add a grommet to finish the edges of the hole.
Notes
I made this DIY iPad case for my original iPad 2 (way back in 2012!), which is much smaller than the current iPads that are available. All of the measurements in this post are for making a case that fits an iPad that is 9.5" x 7.3", so feel free to adjust them as needed to fit your device.
Save your favorite projects!
Create a free account to easily save your favorite projects, tutorials, and recipes.
Create Account