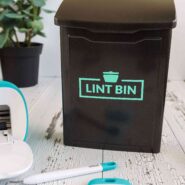
Make A Laundry Room Lint Bin With A Cricut Joy
This wall-mounted lint bin is perfect for a small laundry room: make it in under ten minutes with a Cricut Joy and Smart Adhesive Vinyl! (The screenshots in these instructions were made using the Cricut Design Space app on an iPhone.)
Active Time 5 minutes
Cricut Cutting Time 5 minutes
Total Time 10 minutes
Cost $20
Materials
Instructions
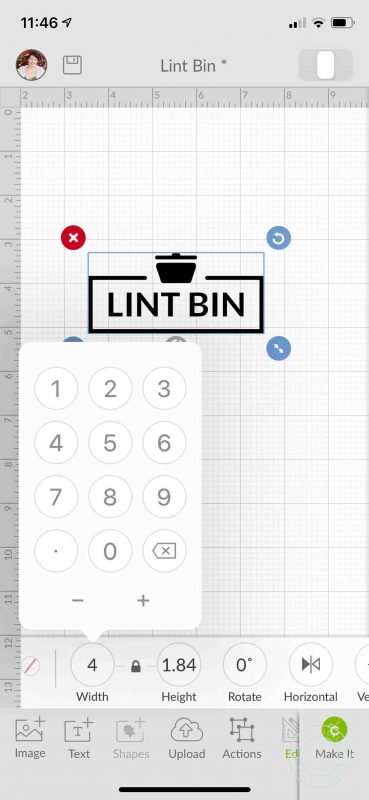
- Open the lint bin graphic in Cricut Design Space. Select the graphic and click the Edit button, then change the size as needed.
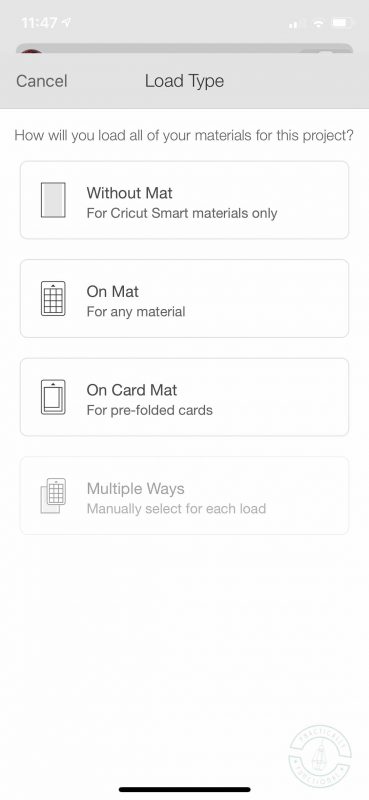
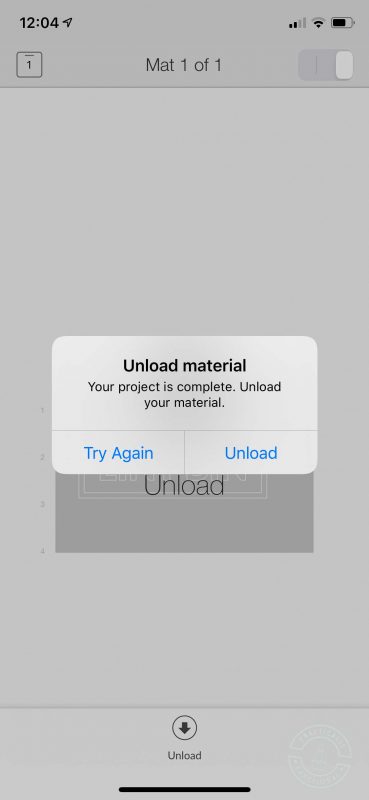
- Select "Without Mat" for the load type. (Always use this setting when cutting Smart materials with a Cricut Joy.)
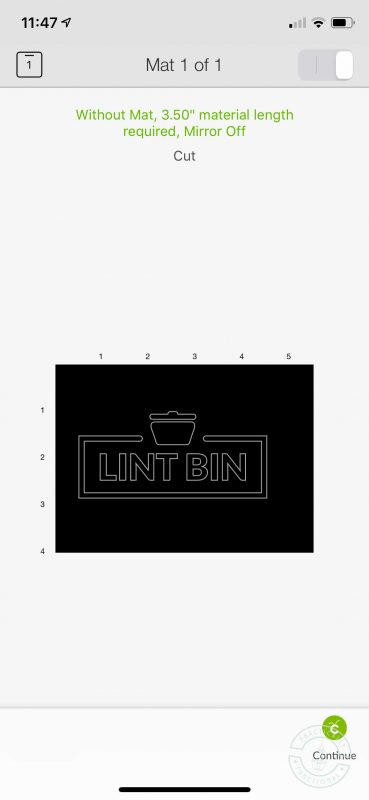
- Make sure the preview of the cut looks correct, then tap Continue in the lower right corner.
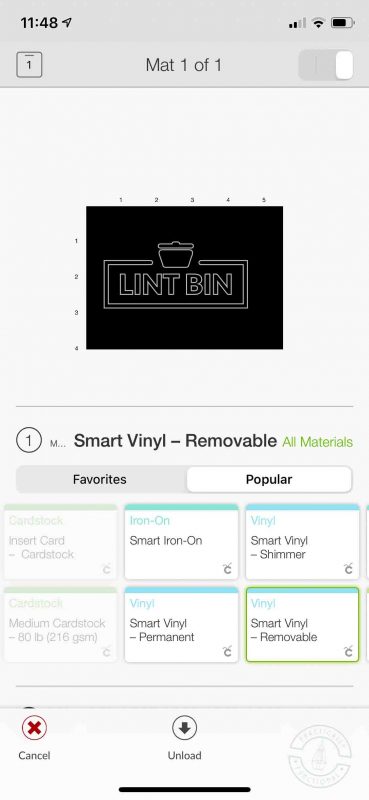
- Select "Smart Vinyl - Removable" as the material.
- Make sure the fine point blade is loaded into your Cricut Joy.
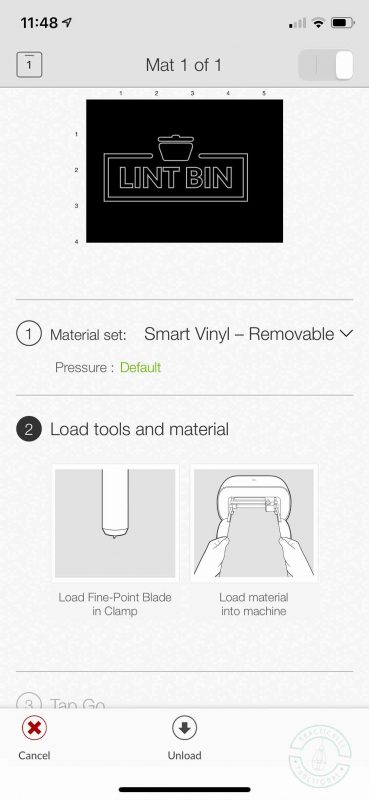
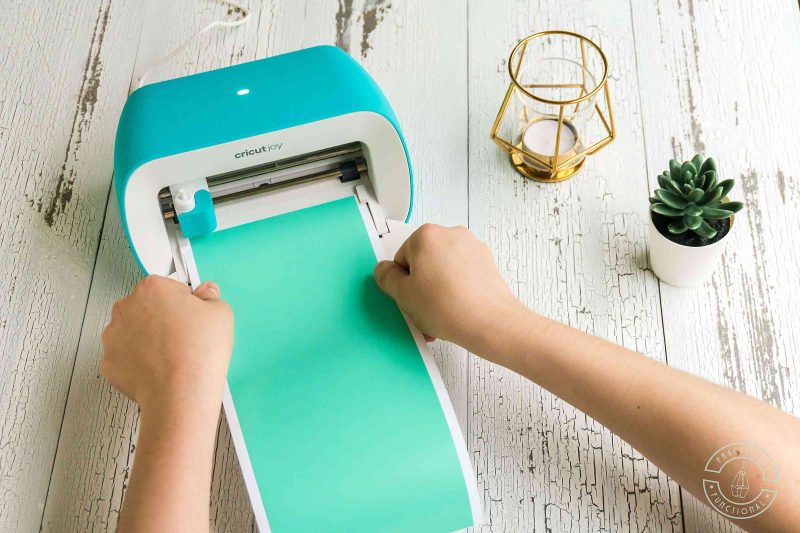
- Load the Smart Vinyl into the Cricut Joy.
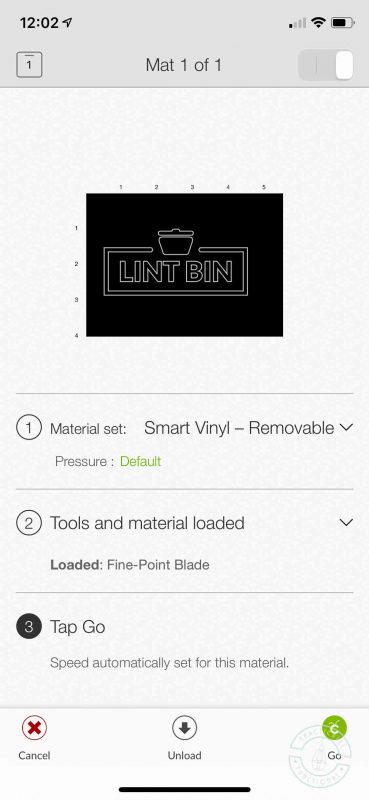
- Tap Go to begin the cut.
- Tap "Unload" to unload the material from the Cricut Joy when the cut is complete.
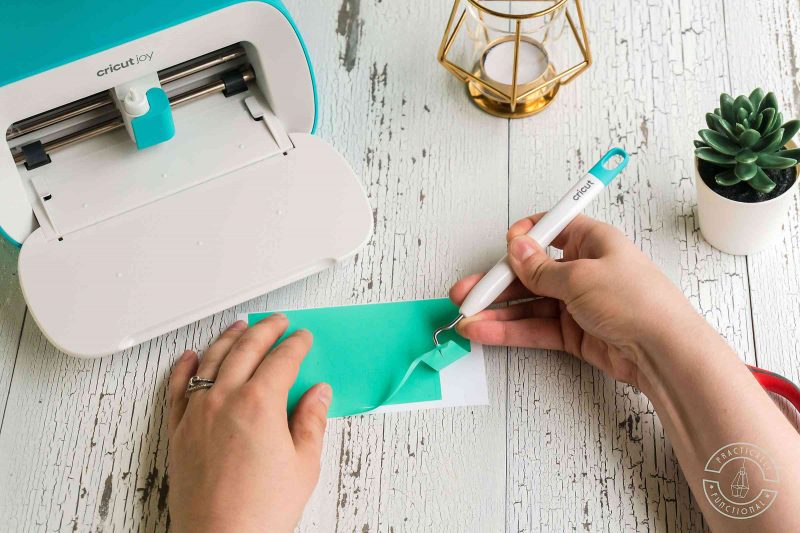
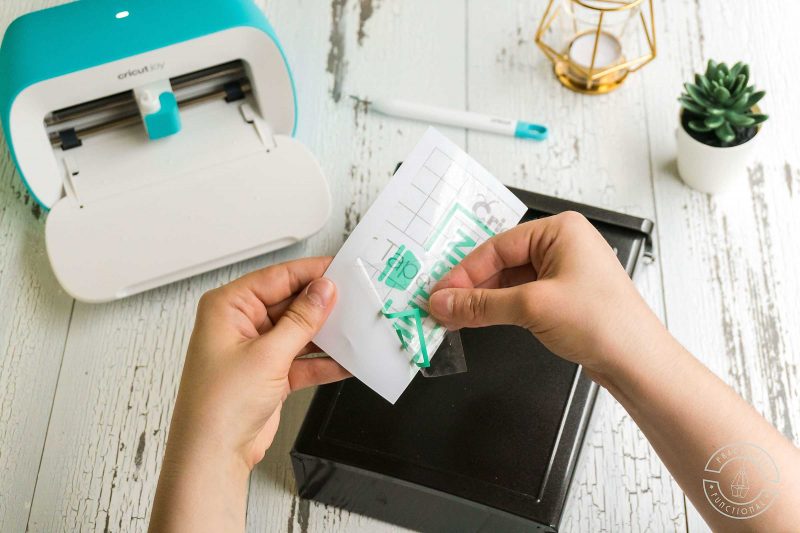
- Weed away any extra background vinyl using the weeder tool.
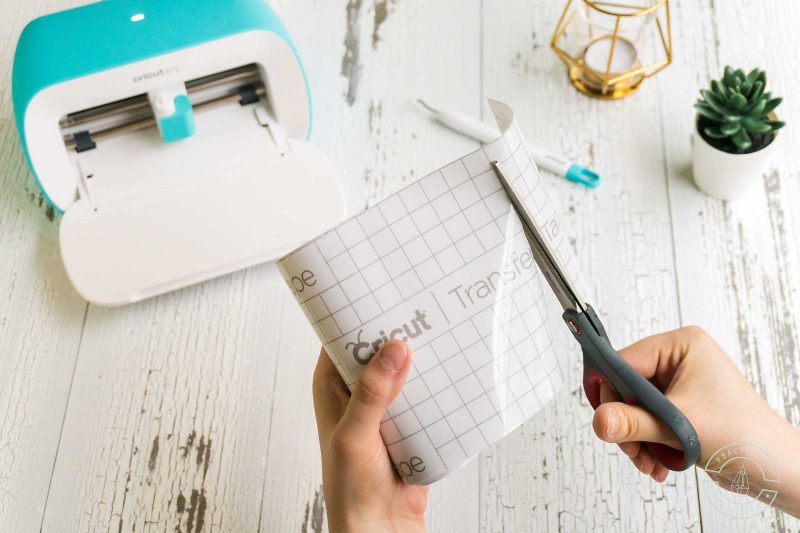
- Trim a piece of transfer tape to the same size as the Lint Bin decal.
- Peel the paper backing off of the clear transfer tape, then position the tape on top of the Lint Bin decal.
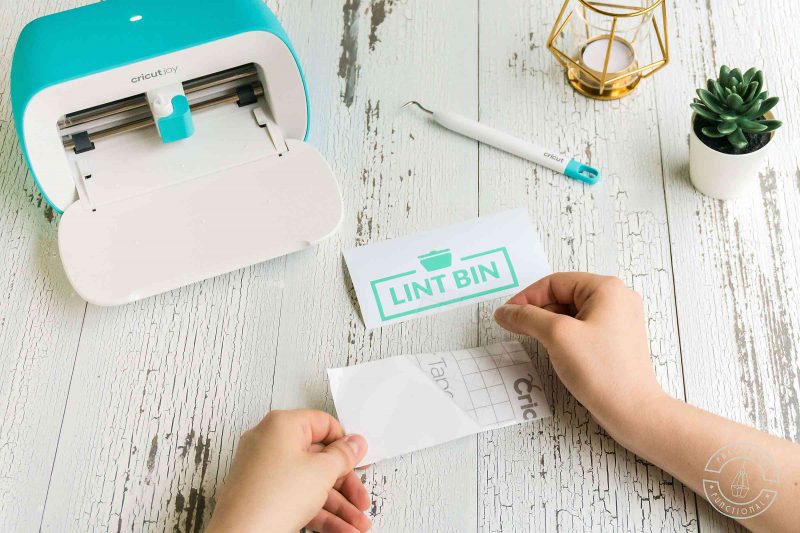
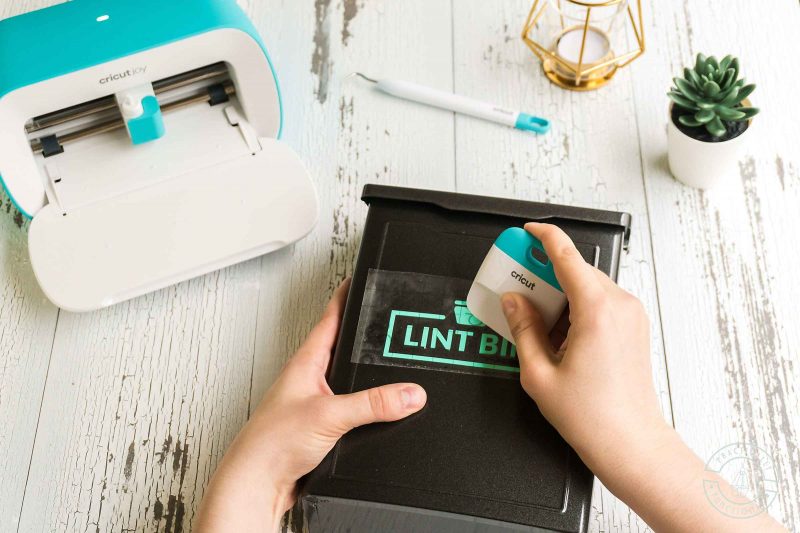
- Press the transfer tape firmly onto the adhesive vinyl (use the scraper tool if you want), then carefully peel back a corner of the transfer tape. The adhesive vinyl should come off the paper backing along with the transfer tape.
- Position the Lint Bin decal on the front of the mailbox and press down firmly using the scraper tool.
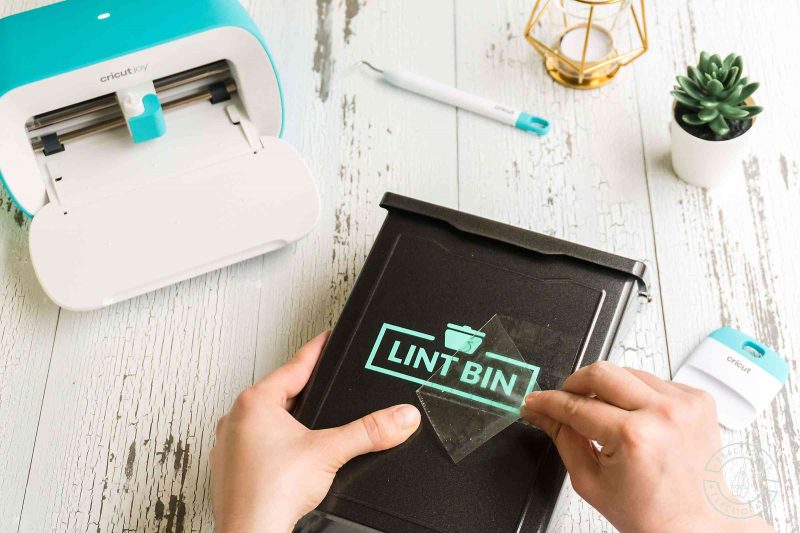
- Carefully peel up the clear transfer tape, leaving the adhesive vinyl decal stuck to the mailbox.
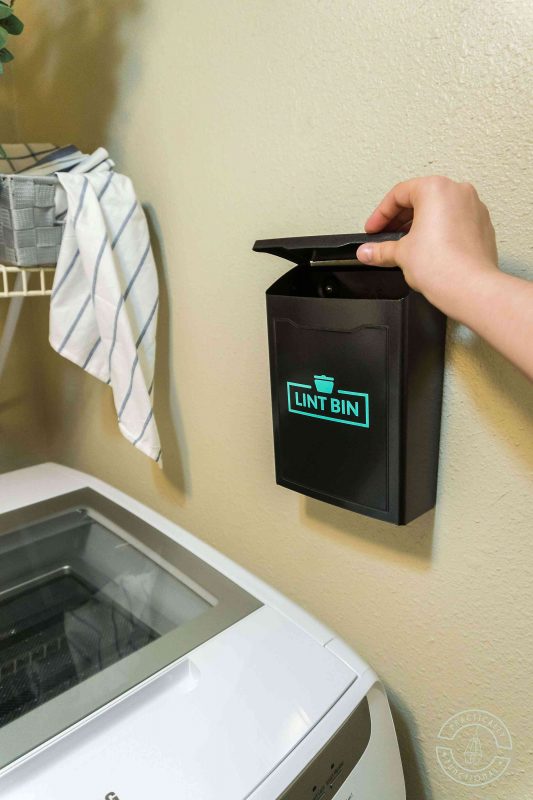
- Install the mailbox on the wall in your laundry room, and you're done!
Save your favorite projects!
Create a free account to easily save your favorite projects, tutorials, and recipes.
Create Account