DIY Disney Countdown Blocks (Plus Cut File)
Are you planning a Disney trip? Count down the days to the magical adventure with this DIY Disney countdown clock—grab the SVG file in this tutorial and make your own countdown clock with your Cricut or Silhouette!
Active Time 30 minutes
Paint Drying Time 30 minutes
Total Time 1 hour
Yield 1 countdown clock
Cost $8
Equipment
- paintbrush
Materials
Countdown Clock
- 1 sheet adhesive vinyl white, for the number blocks
- 1 sheet adhesive vinyl any color, for the words
- transfer tape
- 2-4 wooden blocks
- 2 pieces 2x4 scrap wood about 8"-12" long
Cut File And Fonts
Instructions
- Download the Disney Countdown Clock cut file bundle and fonts used in the cut file. (Links in the Materials section above.)
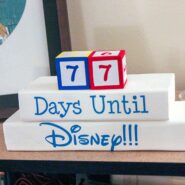
- Figure out how many wooden blocks you need for your countdown clock. This tutorial shows making a countdown clock using four blocks (counts down from 443 days or less), but the Notes section below explains how to figure out how many blocks you need based on how many days you are counting down.
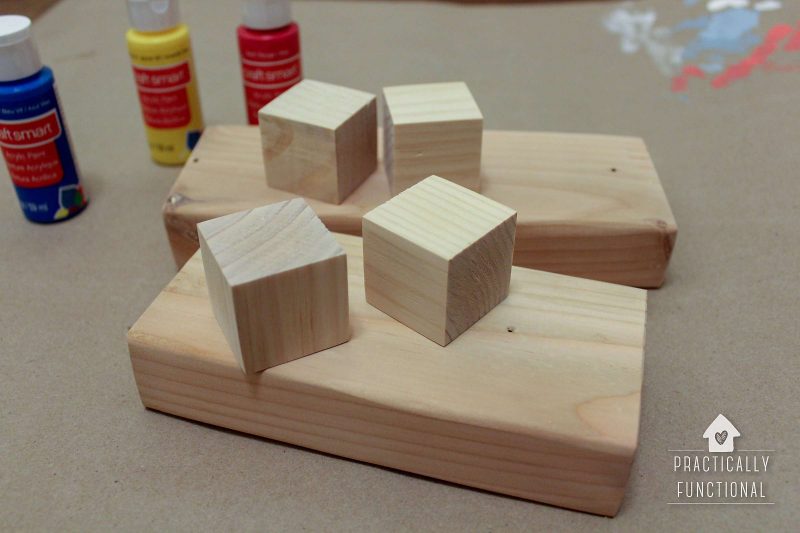
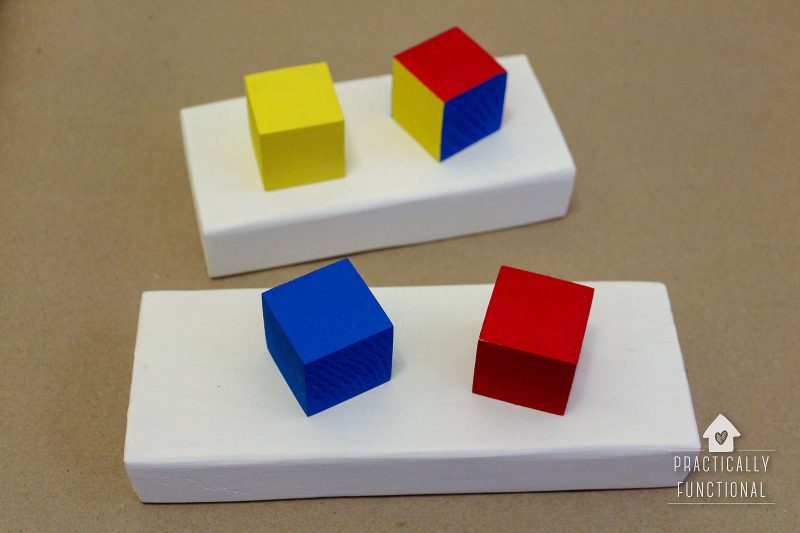
- Paint all of your wooden blocks and the two scrap wood boards.
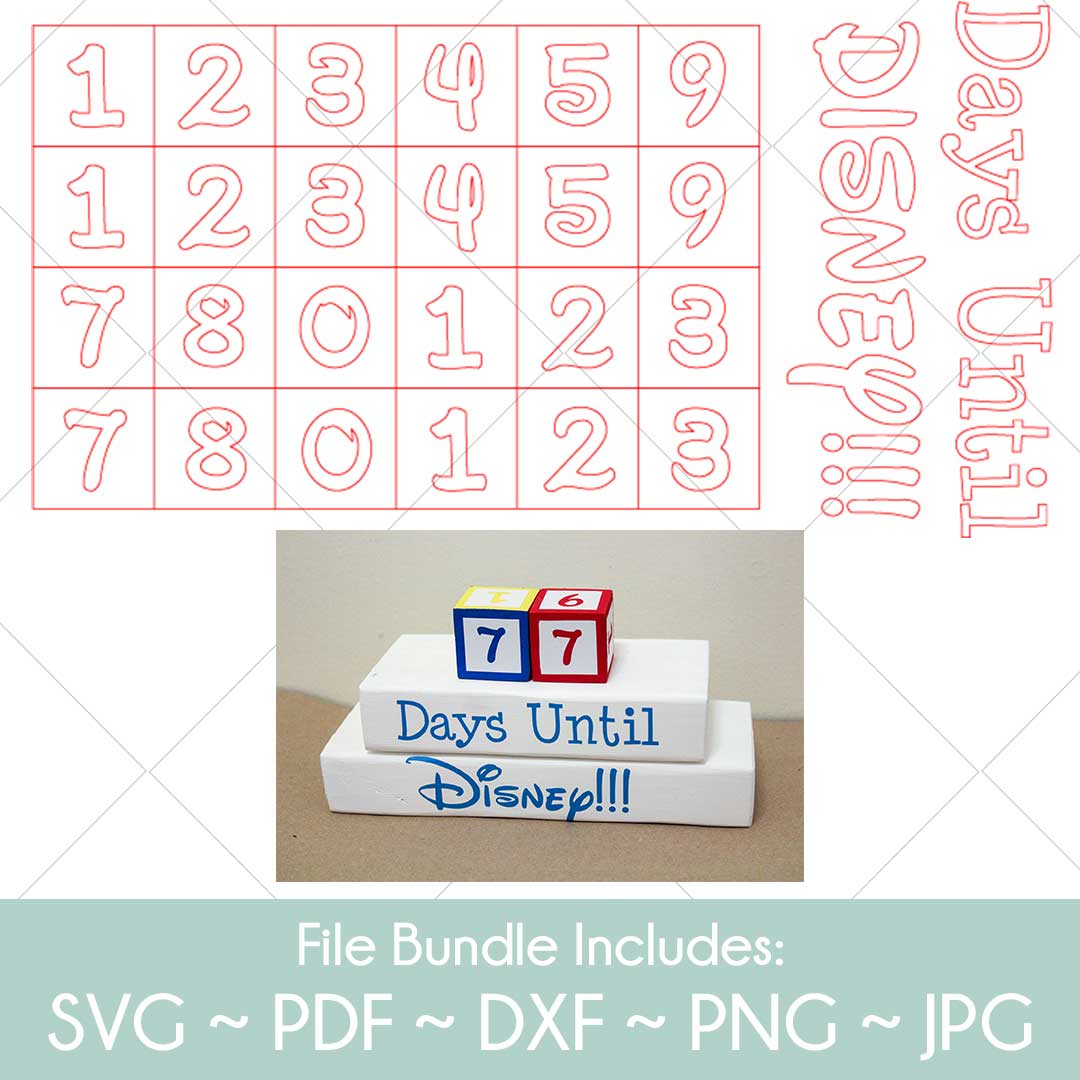
- Using your Cricut or Silhouette, cut out the Disney Countdown Clock cut file from adhesive vinyl. You can use two separate colors for the words and numbers, or use one color for the entire file. Once it's cut, weed away the background vinyl and cut the words apart from the rest of the design.
- Apply a piece of transfer paper or washi tape on top of the "days until" words, then carefully peel the transfer paper and vinyl words off of the backing paper.
- Position the vinyl words in the center of the side edge of a 2x4 block. Press firmly across all the letters until the entire word is firmly attached.
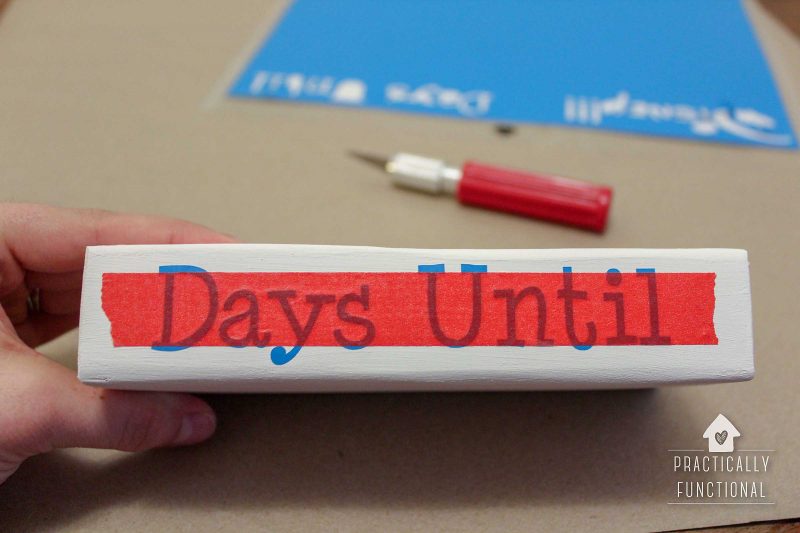
- Carefully peel the transfer paper away from the block, leaving the vinyl words attached to the block. Repeat these steps to apply the "Disney" word to the second 2x4 block.
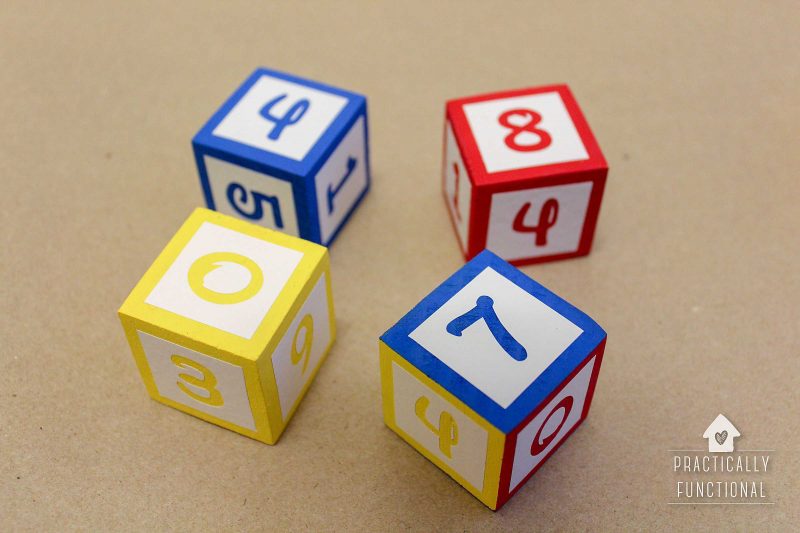
- Use the same process to attach the vinyl numbers to the cubes. The cut file is set up with a square around each number, so you can either use the vinyl number, or you can peel the number away and just use the vinyl square with a number-shaped hole in it.
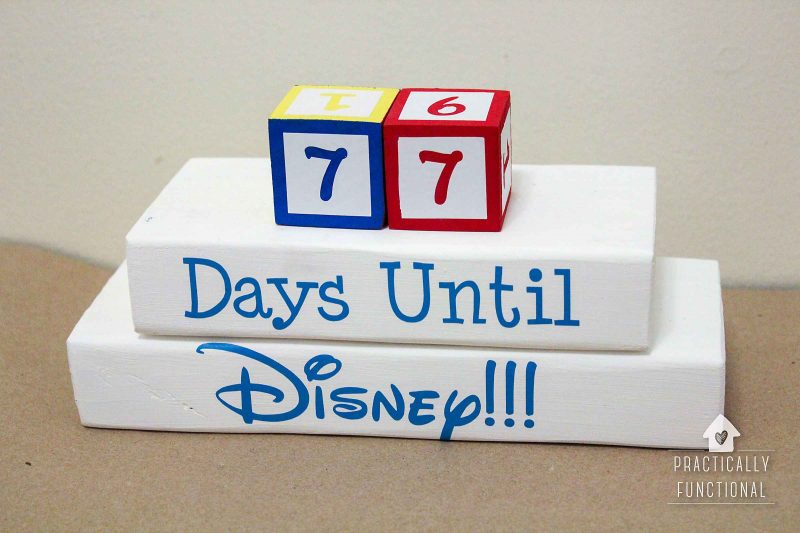
- Stack up the blocks and turn the number cubes until the correct number of days is showing, and you're done!
Notes
To count down from 43 or lower: You only need two cubes to count down from 43, but you have to be careful. The 6 needs to be able to be turned upside down so it can serve as a 9, and you have to put specific numbers on each cube. If you put the numbers 1, 2, 3, 4, 5, and 6 on the sides of one cube, and the numbers 1, 2, 3, 7, 8, and 0 on the other cube, you’ll be able to make every number from 43 to 1 without any problems!
To count down from 110 or lower: You need three cubes for this, and again, make sure your 6 can be flipped over to serve as a 9. Make the first two cubes as described above, and put the numbers 4, 5, 6, 7, 8, and 0 on the third cube.
To count down from 443 or lower: This is how I made the Disney countdown clock in the photos, and you need four cubes for this. Make sure your 6 can be flipped over to serve as a 9 again, and just make two sets of the “43 or lower” cubes.
The cut file linked in the Equipment section above provides enough numbers to make up to 4 cubes, and the 9 can be flipped over to be a 6, so that file will give you everything you need to make a Disney countdown clock that counts down from 443 days or less.
Save your favorite projects!
Create a free account to easily save your favorite projects, tutorials, and recipes.
Create Account